和朋友今天正好聊到CentOS的自动化安装光盘制作问题,就顺便把自己之前的测试过程发出来。希望能够帮到大家。 直接发下自己之前做的时候的工作记录了,因为是工作中使用,添加了一些所需的软件包之类的东西,其实您也完全可以自由发挥,直接装完系统,一个优化好的LNMP等等众多软件都已经安装好了的系统也是完全可能的,想想网上的那些一键安装的ISO… 所以大家加油哦!后期我也会完善本篇文章的具体注释的。
定制步骤
- 安装一个干净的操作系统.包括基本的系统和所需要的工具等. 比如:对于http,mysql等软件,建议使用编译的方式安装, 然后打包放进去,可以减少许多依赖包的麻烦.
- 安装系统后,收集系统已安装的软件包,使用脚本统一转存到一个目录中.
- 在安装光盘复制images镜像,从光盘启动centos安装所需的文件等.
- 定义自己的kickstart安装脚本.
- 按照之前转存的软件(rpm)包, 重新生成光盘的report信息.
- 打包生成ISO文件,及MD5效验码.
光盘结构介绍
- isolinux目录存放光盘启动时的安装界面信息
- images目录包括了必要的启动映像文件
- CentOS目录存放安装软件包及信息
- .discinfo文件是安装价质的识别信息
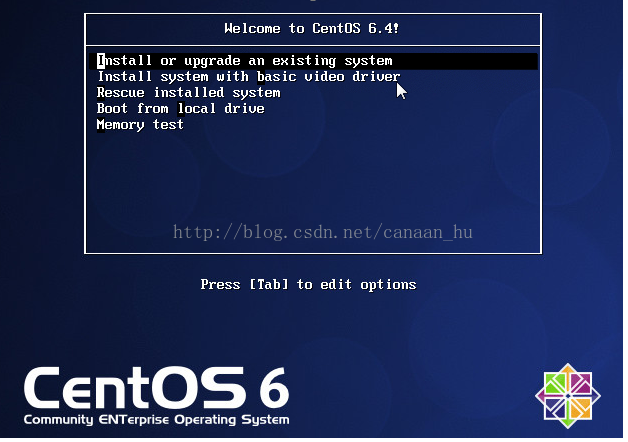
安装时默认第一项是text自动安装,也可以选择第二项进行手动安装…
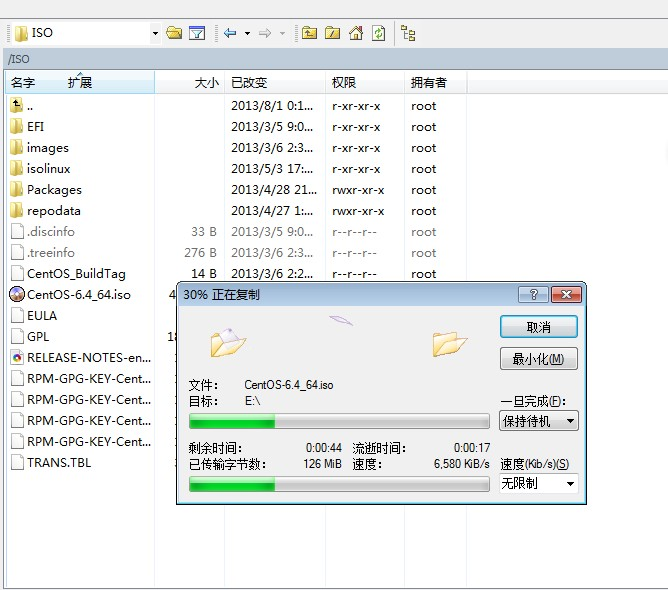
安装完成后的ISO
IP地址:172.16.0.110 root密码:passw0rd
操作过程记录
一、挂载光盘,使用脚本拷贝相关软件包到/ISO/Packages目录下
[root@CentOS ~]# mkdir /mnt/cdrom
[root@CentOS ~]# mount /dev/cdrom /mnt/cdrom
[root@CentOS~]# /usr/bin/rsync -a --exclude=Packages/ --exclude=repodata/ /mnt/cdrom/ /ISO/
[root@CentOS ~]# mkdir -p /ISO/{Packages,repodata}
[root@CentOS ~]# vi copy.sh
cd /root
awk '/Installing/{print $2}' install.log | sed 's/^*://g' >package.txt
DVD='/mnt/cdrom/Packages'
PACKDIR='/root/package.txt'
NEW_DVD='/ISO/Packages'
while read LINE
do
cp ${DVD}/${LINE}*.rpm ${NEW_DVD} || echo "$LINE don't cp......."
done < package.txt
rm -f package.txt
[root@CentOS ~]# chmod +x copy.sh
[root@CentOS ~]# ./copy.sh
[root@CentOS ~]# ll /ISO/Packages/ |wc -l
285
二、定制kickstart安装脚本ks.cfg
[root@CentOS ~]# cd /ISO
[root@CentOS ISO]# cp ~/anaconda-ks.cfg isolinux/ks.cfg
ks.cfg文件内容如下
# Kickstart file automatically generated by anaconda.

#version=DEVEL
install
text
cdrom
lang en_US.UTF-8
keyboard us
network --onboot no --device eth0 --bootproto dhcp --noipv6
rootpw  --iscrypted $6$x8.IJeCQkCgkVmt7$1xpLAdczrfqxYlvkVwMAus6nLPFk6sl45X6CuTsmpFlAko6/NEFyuJXvMgZujfAu5V9T04hZ1P5ZMlR0TZtdK0
firewall --service=ssh
authconfig --enableshadow --passalgo=sha512
selinux --enforcing
timezone --utc Asia/Shanghai
bootloader --location=mbr --driveorder=sda --append="crashkernel=auto rhgb quiet"
# The following is the partition information you requested
# Note that any partitions you deleted are not expressed
# here so unless you clear all partitions first, this is
# not guaranteed to work
#clearpart --linux --drives=sda
#volgroup VolGroup --pesize=4096 pv.008002
#logvol / --fstype=ext4 --name=lv_root --vgname=VolGroup --grow --size=1024 --maxsize=51200
#logvol swap --name=lv_swap --vgname=VolGroup --grow --size=4000 --maxsize=4000

#part /boot --fstype=ext4 --size=500
#part pv.008002 --grow --size=1

clearpart --all
zerombr
part /boot--fstype=ext4 --size=200
part swap --size=2048
part / --fstype=ext4 --size=20000
part /data --fstype=ext4  --grow  --size=200

repo --name="CentOS"  --baseurl=file:///mnt/source --cost=100

%packages
@base
@console-internet
@core
@debugging
@directory-client
@hardware-monitoring
@java-platform
@large-systems
@network-file-system-client
@performance
@perl-runtime
@server-platform
@server-policy
pax
oddjob
sgpio
device-mapper-persistent-data
samba-winbind
certmonger
pam_krb5
krb5-workstation
perl-DBD-SQLite
%end
三、修改/ISO/isolinux/isolinux.cfg文件,默认isolinux.cfg的权限为444,只能读,无法修改
[root@CentOS ISO]# chmod 644 isolinux/isolinux.cfg |
isolinux.cfg文件内容如下
default vesamenu.c32
#prompt 1
timeout 100    ###10秒钟
display boot.msg
menu background splash.jpg
menu title Welcome to use CentOS 6.4!
menu color border 0 #ffffffff #00000000
menu color sel 7 #ffffffff #ff000000
menu color title 0 #ffffffff #00000000
menu color tabmsg 0 #ffffffff #00000000
menu color unsel 0 #ffffffff #00000000
menu color hotsel 0 #ff000000 #ffffffff
menu color hotkey 7 #ffffffff #ff000000
menu color scrollbar 0 #ffffffff #00000000
label linux
  menu label ^Auto Install Xlogin Linux System
  menu default
  kernel vmlinuz
  append ks=cdrom:/isolinux/ks.cfg initrd=initrd.img   ###ks文件路径
label vesa
  menu label Install system with ^basic video driver
  kernel vmlinuz
  append initrd=initrd.img xdriver=vesa nomodeset
label rescue
  menu label ^Rescue installed system
  kernel vmlinuz
  append initrd=initrd.img rescue
label local
  menu label Boot from ^local drive
  localboot 0xffff
label memtest86
  menu label ^Memory test
  kernel memtest
  append -
四、安装制作系统镜像所需要的工具,执行createrepo创建软件仓库
[root@CentOS ISO]# yum -y install anaconda repodata createrepo mkisofs rsync
[root@CentOS ISO]#
[root@CentOS ISO]# declare -x discinfo=$(head -1 .discinfo)
[root@CentOS ISO]# echo $discinfo
1341569670.539525
[root@CentOS ISO]# cp /mnt/cdrom/repodata/*-c6-x86_64-comps.xml repodata/c6-x86_64-comps.xml
[root@CentOS ISO]# createrepo -u "media://$discinfo" -g repodata/c6-x86_64-comps.xml ./
Spawning worker 0 with 607 pkgs
Workers Finished
Gathering worker results

Saving Primary metadata
Saving file lists metadata
Saving other metadata
Generating sqlite DBs
Sqlite DBs complete
五、使用mkisofs命令生成ISO文件
[root@CentOS /]# mkisofs -o CentOS-6.4_64.iso -b isolinux/isolinux.bin -c isolinux/boot.cat -no-emul-boot -boot-load-size 4 -boot-info-table -R -J -v -T /ISO
I: -input-charset not specified, using utf-8 (detected in locale settings)
genisoimage 1.1.9 (Linux)
Scanning /ISO/
Scanning /ISO/EFI
Scanning /ISO/EFI/BOOT
Excluded: /ISO/EFI/BOOT/TRANS.TBL
Excluded: /ISO/EFI/TRANS.TBL
Scanning /ISO/repodata
Scanning /ISO/images
Excluded: /ISO/images/TRANS.TBL
Scanning /ISO/isolinux
Excluded: /ISO/isolinux/TRANS.TBL
Excluded by match: /ISO/isolinux/boot.cat
………………………………………….
98.05% done, estimate finish Tue Jul 17 02:43:01 2012
Total translation table size: 81205
Total rockridge attributes bytes: 35197
Total directory bytes: 59644
Path table size(bytes): 96
Done with: The File(s)                             Block(s)    203755
Writing:   Ending Padblock                         Start Block 203836
Done with: Ending Padblock                         Block(s)    150
Max brk space used 65000
203986 extents written (398 MB)
六、生成ISO文件MD5值
[root@CentOS ISO]# /usr/bin/implantisomd5 /ISO/CentOS-6.4_64.iso
Inserting md5sum into iso image...
md5 = 1355f3a08334162777e6ad867c448d2e
Inserting fragment md5sums into iso image...
fragmd5 = a832435cd7aeb593363287aa551476c9dd21be459aada4c29e9f3475da1e
frags = 20
Setting supported flag to 0
[root@CentOS ISO]#
以上是整个ISO的制作所有的操作过程,看起来绝对够简单吧!希望这篇文章能够帮到你哦! 最后找个例如winscp之类的工具将ISO文件传输到本机,就可以刻盘安装了…